
Discover the Best Way to Clean Vinyl Floors for a Sparkling Finish
Essential Supplies For Cleaning Vinyl Floors
Okay, so you're ready to get your vinyl floors sparkling? Awesome! Before you start, you'll want to gather the right tools. Using the right supplies will not only make the job easier but also help protect your floors from damage. Trust me, you don't want to learn the hard way that some cleaning tools are a big NO for vinyl.
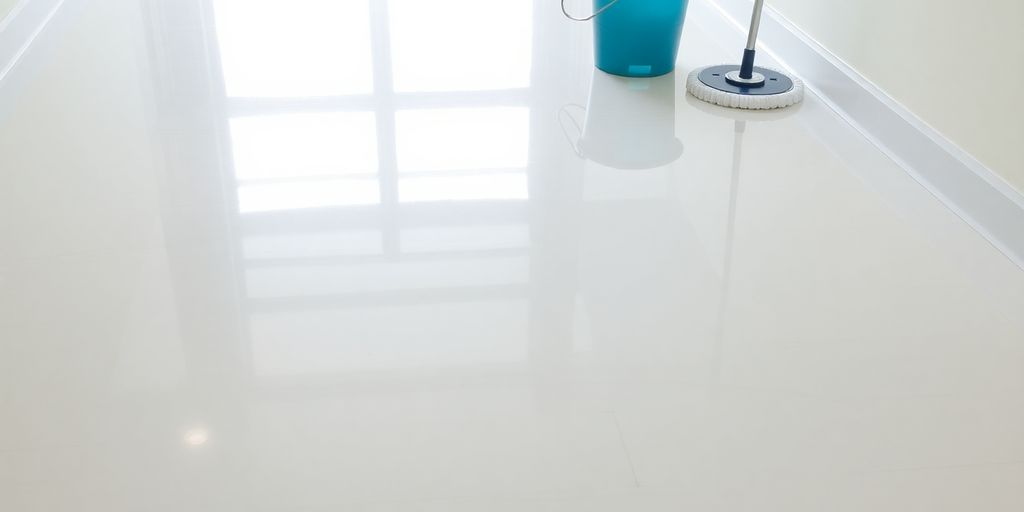
Microfiber Mops for Gentle Cleaning
Microfiber mops are your best friend when it comes to cleaning vinyl floors. They're super gentle, which is important because vinyl can scratch easily. Plus, they're really good at picking up dirt and grime without leaving behind a ton of water. I've tried other types of mops, but I always come back to microfiber. They just work the best. Make sure you have a couple of mop heads so you can switch to a clean one when the first one gets too dirty. This helps avoid spreading the dirt around. You can also use them to apply UV cured finishes after cleaning.
Vacuum Cleaners Without Beater Bars
Vacuuming is a must before you even think about mopping. But here's the thing: you need the right kind of vacuum. Those with beater bars can be way too rough on vinyl floors and cause scratches. Look for a vacuum cleaner where you can turn the beater bar off, or better yet, one specifically designed for hard floors. I use a canister vacuum with a soft brush attachment, and it works like a charm. It gets all the dust and crumbs without any risk of damage. Trust me, your floors will thank you. This is especially important if you have pets that shed a lot. Regular vacuuming will keep your floors looking their best.
Homemade Cleaning Solutions
When it comes to cleaning solutions, you don't always need to buy those expensive commercial cleaners. Sometimes, the best solutions are the ones you can make yourself with stuff you already have at home. Homemade solutions are often gentler on your floors and on your wallet. Plus, you know exactly what's in them, which is great if you're trying to avoid harsh chemicals. I've had great success with simple mixtures like vinegar and water, or a little bit of dish soap in warm water. Just make sure you don't use too much soap, or you'll end up with a sticky residue. Always test a small, inconspicuous area first to make sure the solution doesn't damage or discolor your floors.
Using the right cleaning supplies is half the battle when it comes to keeping your vinyl floors looking great. Don't skimp on quality, and always be gentle. Your floors will thank you for it!
Step-By-Step Guide To Clean Vinyl Floors
Alright, let's get down to business. Cleaning vinyl floors isn't rocket science, but doing it right makes a huge difference. I've messed it up before, trust me. Follow these steps, and you'll have sparkling floors in no time. It's all about the right prep and technique.
Preparing Your Cleaning Solution
First things first, you gotta mix up your cleaning solution. This is where you decide if you're going the store-bought or homemade route. I've tried both, and honestly, sometimes the simple stuff works best. For a basic cleaner, mix about a quarter cup of pH-neutral cleaner with a gallon of warm water. If you're dealing with some serious grime, you might want to add a squirt of dish soap. Just don't go overboard, or you'll end up with a sudsy mess. Make sure it's all mixed well before you start mopping.
Mopping Techniques for Best Results
Okay, now for the fun part – mopping! But before you start slinging that mop around, make sure you've swept or vacuumed the floor. Otherwise, you're just pushing dirt around. Use a microfiber mop – those things are amazing. Dip it in your cleaning solution, but wring it out really well. You don't want your floors soaking wet. Mop in sections, overlapping each stroke slightly. If you hit a stubborn spot, give it a little extra attention with the mop or a soft brush.
Drying and Maintaining Your Floors
Once you've mopped the entire floor, it's time to dry it. You can let it air dry, but I usually grab a clean, dry microfiber cloth and give it a quick once-over. This helps prevent water spots and streaks. Plus, it speeds things up. To keep your floors looking good, sweep or vacuum regularly to get rid of loose dirt and grime.
I learned the hard way that letting spills sit is a bad idea. They can stain or damage your vinyl over time. So, clean up spills as soon as they happen. Also, consider using rugs in high-traffic areas to protect your floors from wear and tear. Trust me, a little prevention goes a long way.
Best Commercial Cleaners For Vinyl Floors
When it comes to keeping your vinyl floors sparkling, there are tons of commercial cleaners available. It can be hard to choose! Let's break down what to look for and some brands that people seem to like.
Choosing pH-Neutral Cleaners
pH-neutral cleaners are generally the safest bet for vinyl floors. Acidity can damage the surface over time, leading to discoloration or even structural issues. You want something that will lift dirt without stripping away the floor's finish. Look for cleaners specifically labeled for vinyl or LVP install flooring.
Avoiding Harsh Chemicals
Harsh chemicals like bleach or ammonia can really mess up your vinyl floors. They can cause fading, cracking, and other damage that's just not worth it. Always read the labels carefully and avoid anything with super strong chemicals.
It's better to go with something gentle and do a little extra scrubbing than to risk ruining your floors with harsh stuff. Plus, those chemicals can be bad for your health and the environment, so it's a win-win to avoid them.
Top Recommended Brands
Okay, so here are a few brands that consistently get good reviews for cleaning vinyl floors:
- Armstrong Once 'n Done: This one is a classic and is specifically designed for vinyl and laminate floors. It's known for leaving a streak-free shine.
- Bona Stone, Tile & Laminate Floor Cleaner: While it's not exclusively for vinyl, it works great on it. People love that it's gentle and doesn't leave a residue.
- Weiman Hardwood Floor Cleaner: Again, not just for vinyl, but it's pH-neutral and safe to use. It's also good at removing tough stains. Consider water damage repair if stains persist.
Remember to always test any cleaner in a small, inconspicuous area first to make sure it doesn't damage your floors!
Homemade Cleaning Solutions For Vinyl Floors

Want to save some money and avoid harsh chemicals? Making your own cleaning solutions for vinyl floors is surprisingly easy. Plus, you probably already have most of the ingredients in your pantry! Let's explore some simple recipes that will leave your floors sparkling.
Vinegar and Water Mixture
A simple vinegar and water solution is a fantastic all-purpose cleaner for vinyl floors. It's cheap, effective, and eco-friendly. I use this mix for regular cleaning, and it works wonders. Here's how to make it:
- Mix one cup of white vinegar with one gallon of warm water.
- Use a spray bottle or bucket for application.
- Mop as usual, and let air dry.
Vinegar's acidity helps cut through grime without leaving a residue. It's also a natural deodorizer, which is a nice bonus.
Dish Soap Enhancements
Sometimes, you need a little extra oomph to tackle greasy or grimy spots. That's where dish soap comes in. But be careful – a little goes a long way! Too much soap can leave a dull film on your floors. For tougher messes, consider water damage repair.
- Add only a few drops of liquid dish soap to your vinegar and water mixture.
- Make sure to use a gentle dish soap, not something too harsh.
- After mopping with the soapy solution, rinse with plain water to remove any soap residue.
Baking Soda for Stubborn Stains
Baking soda is my go-to for tackling those really stubborn stains on my vinyl floors. It acts as a gentle abrasive, lifting stains without scratching the surface. Here's how I use it:
- Make a paste of baking soda and water.
- Apply the paste to the stain and let it sit for a few minutes.
- Gently scrub with a soft cloth or sponge.
- Rinse thoroughly with clean water.
Baking soda is great for spot cleaning, but I wouldn't recommend using it for the entire floor regularly. It's a bit more labor-intensive, but it's worth it for those tough spots!
Tips For Maintaining Vinyl Floors
Maintaining vinyl floors doesn't have to be a chore. With a few simple habits, you can keep them looking great for years. It's all about preventing damage and keeping up with regular, light cleaning.
Regular Sweeping and Vacuuming
Regular sweeping or vacuuming is your first line of defense. Dirt and grit can scratch the surface of your vinyl floors over time, dulling their shine. Aim to sweep or vacuum at least a couple of times a week, especially in high-traffic areas. Make sure your vacuum doesn't have a beater bar, or that it's turned off, as this can also cause scratches. A soft brush attachment is ideal.
Immediate Spill Cleanup
Don't let spills sit! The longer a spill sits, the higher the chance it'll stain or damage your vinyl.
Here's a quick guide:
- Blot spills immediately with a clean, dry cloth.
- For sticky spills, use a damp cloth with a little mild dish soap.
- Rinse the area with clean water and dry thoroughly.
I had a coffee spill last week, and because I cleaned it up right away, there's no stain at all. It really makes a difference!
Using Rugs in High-Traffic Areas
Rugs are your friend! Place rugs or mats in high-traffic areas like entrances, hallways, and in front of sinks. This helps to trap dirt and moisture before they get a chance to reach your vinyl floors. Consider hardwood flooring options for areas prone to heavy use.
Common Mistakes To Avoid When Cleaning Vinyl Floors
Using Abrasive Cleaners
One of the biggest no-nos when cleaning vinyl floors is using abrasive cleaners or scrub brushes. These can easily scratch and dull the surface, ruining the floor's finish. I learned this the hard way when I tried to scrub off a stubborn stain with a scouring pad – big mistake! Now I stick to soft microfiber mops and gentle cleaning solutions. Avoid anything that says
How To Remove Stains From Vinyl Floors

Identifying Different Types of Stains
Okay, so you've got a stain. First things first: what kind of stain is it? Knowing this is half the battle. Is it something oily, like cooking grease? Or maybe something water-based, like juice or coffee? Perhaps it's something tougher, like ink or a pet accident? Identifying the stain will help you choose the right cleaning method. Different stains respond to different treatments, so a little detective work goes a long way. For instance, food stains might need a baking soda paste, while ink might require something stronger like rubbing alcohol.
Effective Spot Cleaning Techniques
Alright, you've ID'd the stain. Now it's time to get to work. Here's the deal: always start with the gentlest method first. Grab a soft cloth and try wiping the stain with warm, soapy water. If that doesn't work, move on to something a little stronger. Here are a few techniques I've found useful:
- Baking Soda Paste: Mix baking soda with a bit of water to form a paste. Apply it to the stain, let it sit for a few minutes, and then gently scrub. Rinse well.
- Vinegar Solution: Mix equal parts white vinegar and water. Spray it on the stain, let it sit, and then wipe it away. Vinegar is great for general cleaning and can help with some stains.
- Rubbing Alcohol: For tougher stains like ink or permanent marker, dab a bit of rubbing alcohol on a cloth and gently blot the stain. Be careful not to rub too hard, as this can damage the vinyl. Always test in an inconspicuous area first!
Remember, patience is key. Don't scrub too hard, and don't give up after the first try. Sometimes it takes a few attempts to fully remove a stain. Also, always rinse the area well after cleaning to remove any residue.
When to Call a Professional
Sometimes, despite your best efforts, a stain just won't budge. Or maybe you're dealing with a really large or stubborn stain that you don't want to risk making worse. That's when it might be time to call in the pros. A floor sander rental service might have specialized cleaning solutions and equipment that can tackle even the toughest stains without damaging your vinyl floors. Plus, they can offer advice on how to prevent future stains. It might cost a bit more, but it could save you from having to replace your entire floor! Also, if you're dealing with something like old adhesive or a stain that's been there for ages, a professional is definitely the way to go.
If you want to keep your vinyl floors looking great, knowing how to get rid of stains is key. Start by using a soft cloth and a gentle cleaner to wipe away spills. For tougher stains, a mix of vinegar and water can work wonders. Always remember to test any cleaner on a small area first. For more tips and tricks on maintaining your floors, visit our website today!
Final Thoughts on Cleaning Vinyl Floors
Cleaning vinyl floors doesn’t have to be a hassle. With the right tools and a bit of know-how, you can keep your floors looking fresh and shiny. Remember to sweep or vacuum regularly to prevent dirt buildup, and use gentle cleaning solutions to avoid damage. Whether you go for a store-bought cleaner or whip up a homemade mix, just make sure to rinse well to avoid any sticky residue. Stick to a routine, and your vinyl floors will stay in great shape for years to come. Happy cleaning!